June 2013 – Lots of work is getting done with the warmer weather. With the hull completed and right side up, she is ready to come together. This means the deck, cabin, centerboard, cockpit and coach roof, tiller, masts….

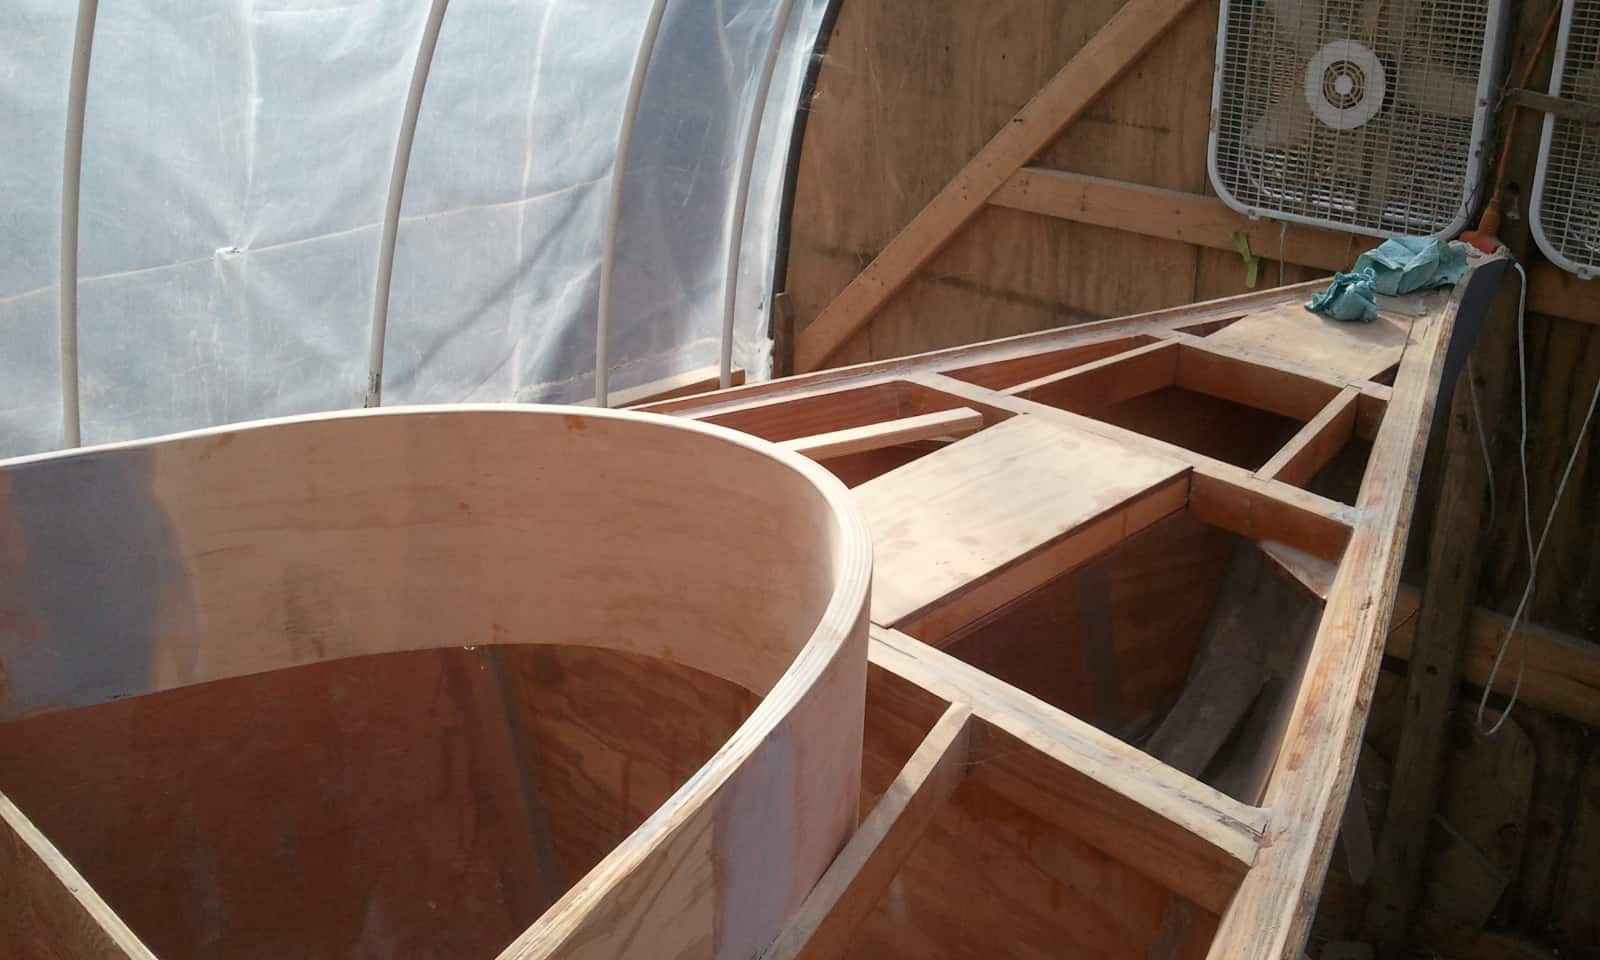
First, I cut, scarfed and installed an additional bulkhead 18 inches behind where the cockpit was originally going to begin. This bulkhead now divides the slightly larger cabin from the slightly smaller cockpit. Next I cut the interior bulkheads where the interior of the cabin is to be to leave it open except for where the cabinets will go. Then I added the upper part of three bulkheads which will reach to the cabin roof. I had to guess on this, as the coach roof is yet to be built. Once these things were done, I sanded the hull interior smooth, then filleted and glass-taped the bulkheads to the hull bottom and sides. This is time-consuming, the first pass is filleting (over wet pure epoxy coating put on with a brush) using a pretty thick mix of epoxy and talc applied with a “Glad” pastry bag, smoothed to shape with a piece of one-inch PVC pipe. Then cover this fillet with 3 inch fiberglass tape, smooth this over with a coat or two of epoxy and talc using a piece of one and a half inch PVC pipe. Then sand all smooth by hand. This reinforces the joints between the plywood bulkheads and plywood hull and topsides. I also filled in the pockets of the bottom between the plank keel and the chine logs with 2 by pine or fir so there were no crevices for water to sit in the two anchor compartments, one fore and the other aft.
Once this filleting step was done, I painted the entire interior with a diluted epoxy sealer two or three times, to the point of rejection. The product I used was especially designed for this, E Bond 106 Polyamide Epoxy Coating from E Bond Epoxies in Ft Lauderdale. It has an extended pot life which you can extend longer by keeping left-over mixed product in the freezer. So, now if water gets into the bottom of the boat, it just sits there on top of this coating and doesn’t moisten the plywood. The entire interior will also be painted with Sherwin Williams two-part Tile Clad epoxy paint once each section is completed.
Centerboard Trunk & Centerboard
The centerboard trunk was pretty quick to make and install. I made the two halves one with the end posts in place, coated them with Dynel cloth and epoxy, then two coats of Awlgrip 545, then two coats of Blue Water Marine Copper Shield 35, a hard modified epoxy bottom paint, then joined them and made one last fillet at this joint and painted that joint. Next, I cut the hole in the floor of the cabin again. It had to be wider than I had thought as the trunk extends through the floor to the very bottom of the boat.


The trunk was made longer on the bottom than needed, then scribed, taken out and and cut and then epoxied to the floor of the hull. This joint will be finished on the bottom when the boat is lifted to install the centerboard. Once this was scribed, I removed it, cut it along the scribe lines and then epoxied the trunk in place.
The centerboard is next. The basic frame is 2×6’s glued on edge. Then a hole is cut for the lead ballast and the first layer of plywood is put on one side, three 50-lb weights inserted and epoxied in place. Then a layer if 3/8 in ply over the side the weights went in on, then one more layer of ply on both sides. Shaping to a foil profile as you go. Don’t try to bend this crappy plywood.


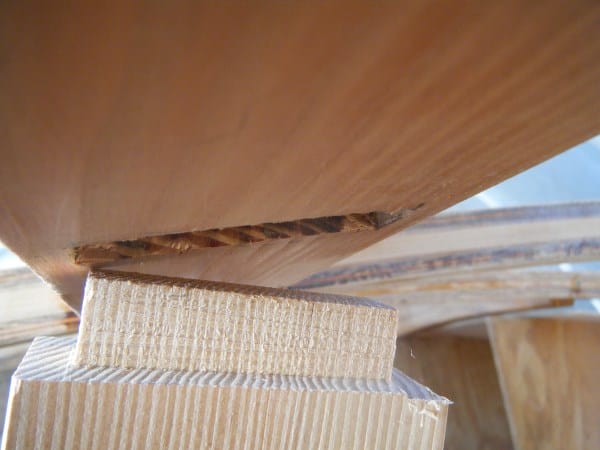
I’ll take a moment here to whine about the marine plywood I’ve been getting. It is manufactured by Roseburg in Oregon, and I buy it at Better Living in Charlottesville, which is a terrific place. The batch I had bought recently from a local building supply company had two pieces which seemed to be de-laminating. See the photo above of a piece I had just run through the table saw. It looks like the glue was allowed to dry before the two pieces were pressed together. One of the pieces I had cut for the centerboard had this problem along one edge. See below where I have stuck some sticks of wood into the crack.

I ended up opening the crack where it was de-laminated and pouring epoxy into it and then pressing it back together and letting it set up. I complained to the salesman at the building supply store who then showed the small defective piece shown in the image above to the factory rep, and was told that the sales rep told him that it was a “user problem,” that is, that I had caused the delamination from improper use. Total BS. Anyway, I think this batch was made on a Friday afternoon after a two-beer lunch.

I have a photo somewhere of the finished centerboard, and will post it soon. It’s still lying covered with a Chinese tarp on a pair of sawhorses at Piers’ house, next to the hoop house. I won’t install it until I lift the boat four feet in the air, just before putting it on a trailer.
The deck beams and half beams were made mostly of ash and the compound cuts where they connect with the sheer clamps and trunk carlins I could not have done without my Japanese hand saw I purchased at Lowe’s.

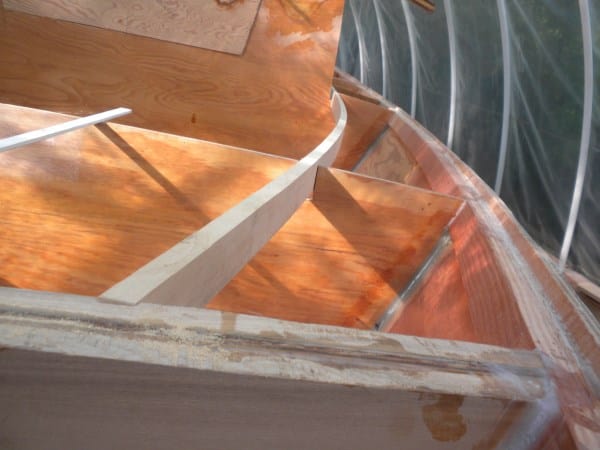


Cabin and Coach Roof These cabin sides and coach roof beams took forever. Making the beams was pretty straightforward, just laminating three layers in a curve for the roof. Because I didn’t know what I was doing, I thought this through and experimented many times before cutting the sides of the cabin where they will meet the roof. Here is the beginning of this process. Once the trunk carlins and deck beams were in, I proceeded with the cabin trunk and cockpit coaming. This worked out sort of OK, but I will definitely be able to do this better next time. The carlin wasn’t angled or inclined toward the inside of the boat enough to put the trunk cabin sides leaning in at the proper angle. They ended up being too vertical. The other mistake is that I laid the 4×8 sheets lengthwise and scarfed only once along each of the cabin sides. This didn’t give enough opportunity to have a more compound curve along the sides. It would have worked better to scarf a new piece every three feet so as to create a nice curve along the length of the cabin sides.


Deck side beams and trunk carlins 
From the front, starboard side 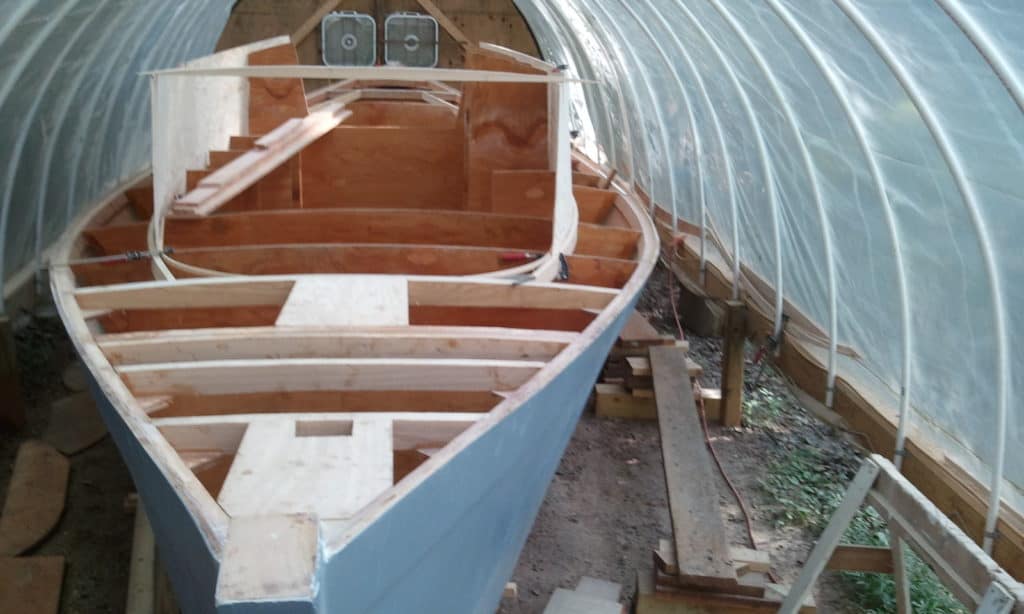
From the bow


Cockpit Coaming Below, a photo of laminating the after part of the cockpit coaming. I used some cheap ~3/16ths ply from Lowe’s for this as Better Living, where I have bought all of my marine plywood, wasn’t able to get any 1/4 inch marine plywood.

Laminations – after end of cockpit coaming 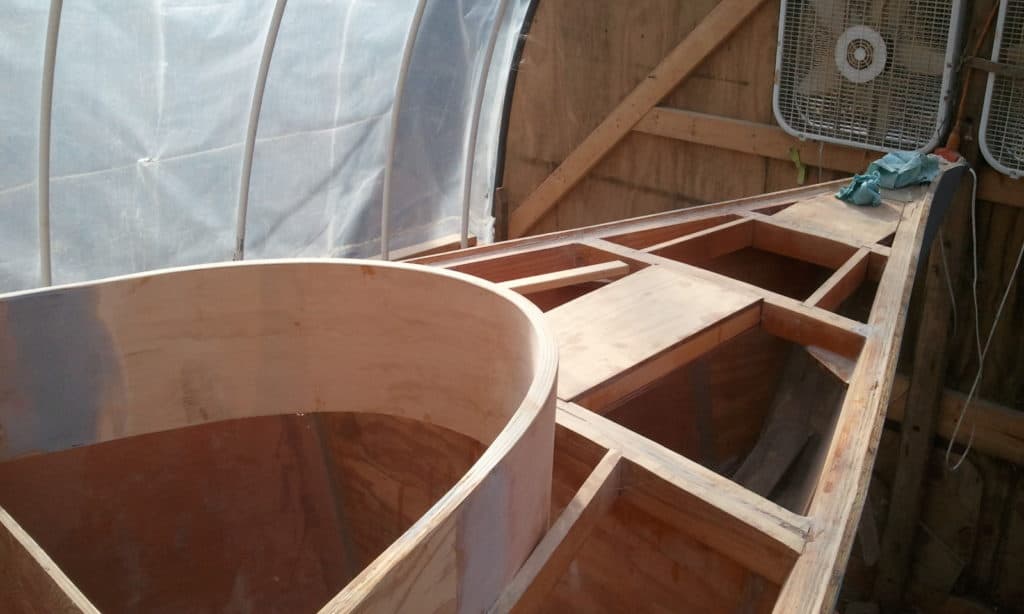
More completed cockpit coaming
Laminations were scarfed into the main part of the coaming, 12:1 scarf; twice; as the main coaming is two layers, one layer of half inch plywood which continues from the cabin sides plus an additional layer of 3/8″ plywood from the cabin back to this joint. I used some cheap ~3/16ths ply from Lowe’s for this as Better Living, where I have bought all of my marine plywood, wasn’t able to get any 1/4 inch marine plywood. In the photos above you can see the rear mast partner (no holes made yet for the mast and tiller) the deck beams, carlins for the rear hatch and the after deck stiffener.

In the photo above, you can see on the right, the 12:1 vertical scarf in the half inch plywood where the curved front portion will be attached. You can also see the main mast partner where it is fitted into the main deck beam. The bulkheads toward the rear of the cabin were only four feet high, so I extended them higher using a sine wave cut rather than just a straight joint. You can see this in this photo of the cockpit and cabin with the coach roof beams in place. The hole for the companionway hatch entry is quite large. One reason is that the ceiling of the cabin is low, about five feet, so, when cooking or working in the galley, if you leave the sliding hatch open, you can stand up – and also have a nice view… of that gigantic wave crashing down on you from behind. Later, I made this opening smaller.

Notice the darker color the E Bond 106 gives the plywood interior. This photo shows the setting up of the position of the roof beams and the beginning of the process of attaching them to the sides of the cabin. First the beams were attached to the 1/2 inch thick cabin sides, then I put 1/2 inch plywood strips between each two beams, then put a half inch plywood strip all the way around the outside to reinforce the connection between the sides and the top. It ended up being quite stiff; especially after the roof went on.
It is pretty boring reading about this boat building, so here are a couple of bridges to look at.

A small bridge, for the lawn mower 
A 25 foot bridge I built across our little creek which is just behind the hoop house
Below is the coach roof with the interior ceiling of 3/16 inch plywood from Lowe’s having been installed center to center, piece by piece, on the underside of the 1 1/2 inch by 1 1/2 inch square laminated roof beams beams and then 1 1/2 inch Dow board insulation epoxied between the beams and the interior ceiling and being flush with the top of the laminated coachroof beams. I reinforced the joint where the cabin side meets the coachroof by putting a 1 1/2 wide piece of 1/2 inch plywood between each two beams and another strip of 1/2 plywood about two inches wide, tapered at the bottom, around the sides even with the top edge.

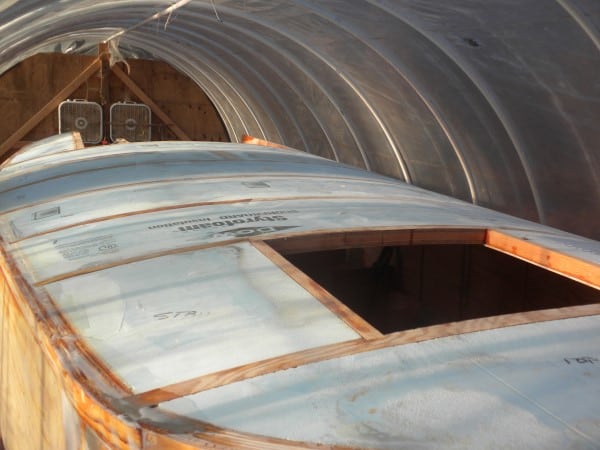
Next will be the quarter inch plywood roof epoxied to complete this “sandwich” of a roof. Below is a detail of the centerboard-lifting compression post. There will be an eye bolt with a block at the top for lifting the centerboard.

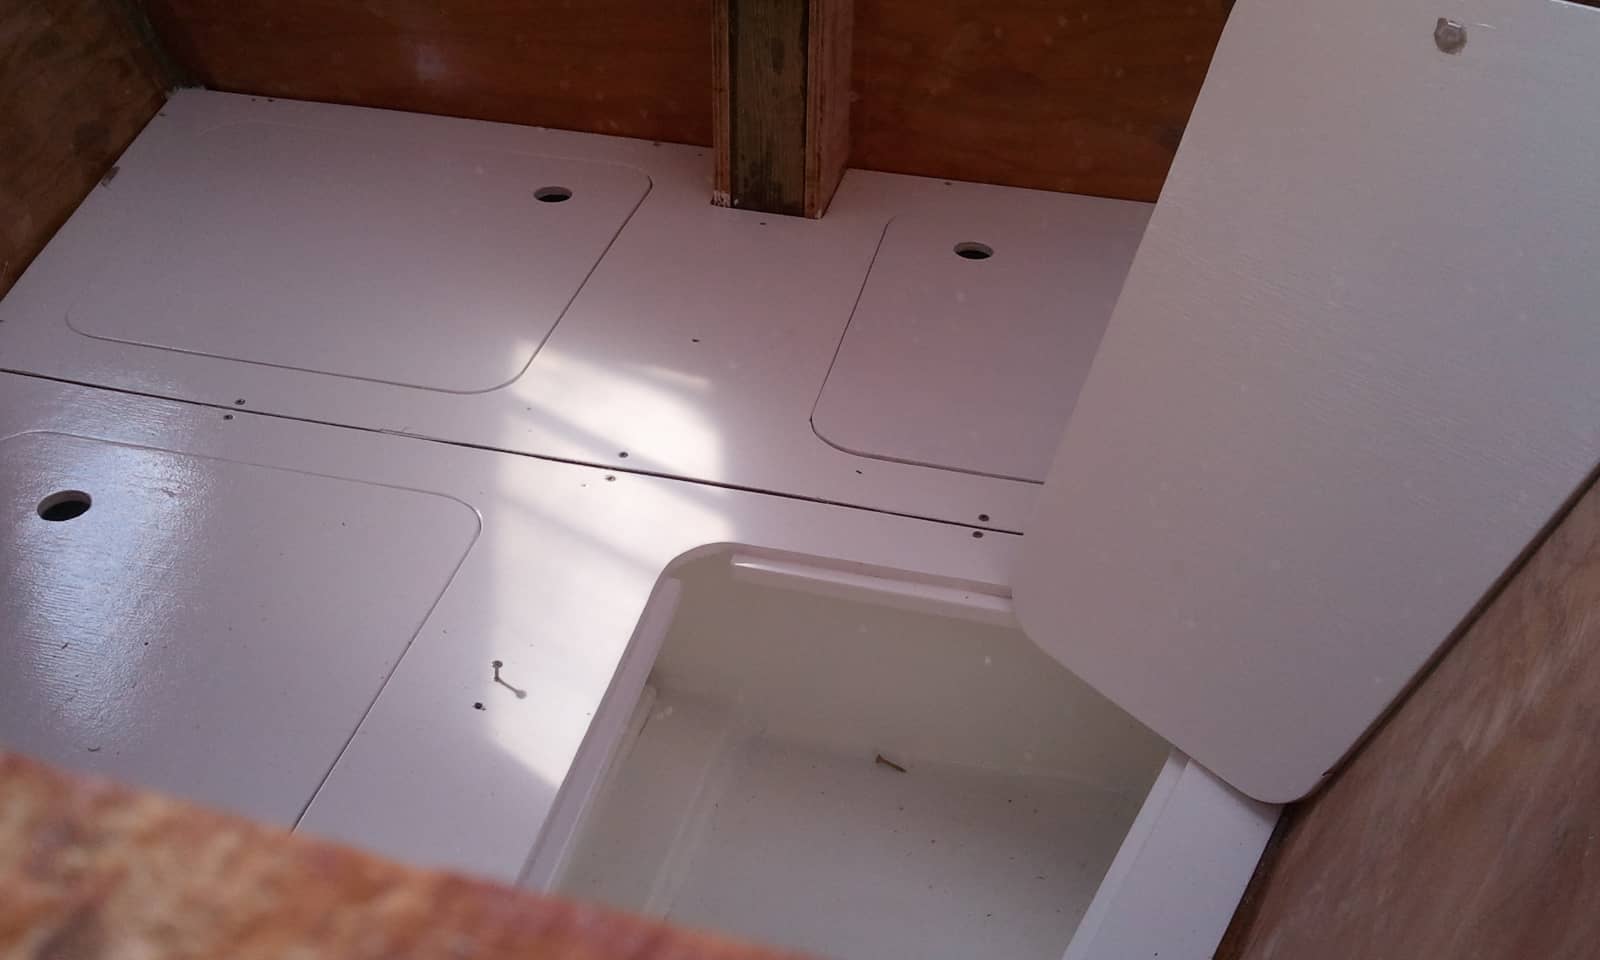
While the coach roof and sides were being worked on, I also made and painted the pieces for the v berth, and got it all installed and painted with the same Tile Clad from Sherwin Williams. A few images below.